
Kids Activities
|December 20, 2017
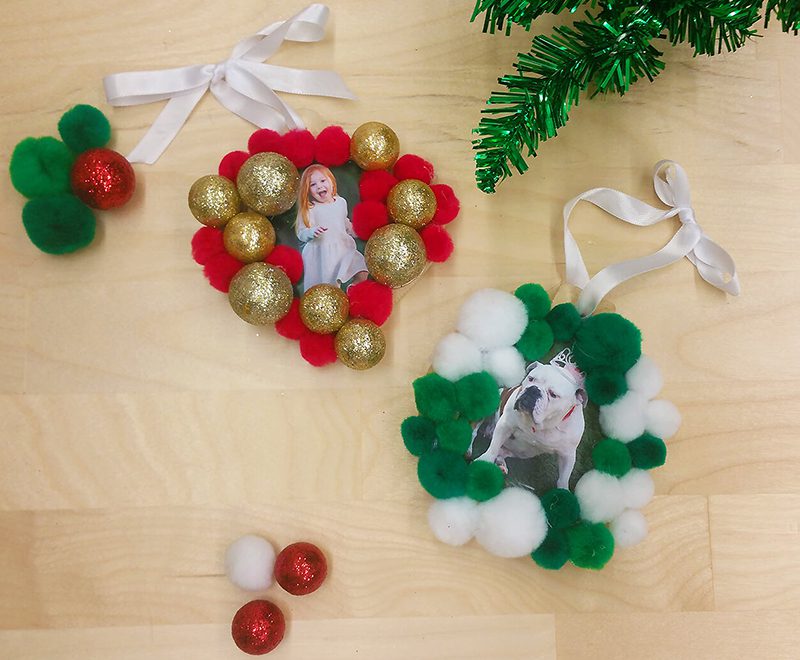
Make Your Own Pom Pom Ornament
As chilly winter weather settles in, we’ve come up with a way to keep your littles busy (while keeping cozy indoors!) by creating a fun keepsake that you can cherish for years to come. With a few supplies found at your local craft store making a custom ornament is easy and enjoyable for kids of any age and parents, too.
Step 1: Supplies
 What you need:
- Ornament shapes (ours are wooden found at a craft store, you can make your own by cutting them out of cardboard or construction paper)
- Decorative pom poms
- Hot glue gun or craft glue
- Ribbon
- Photo cut to size of ornament
Gather your supplies and lay them all out on the table. Choose your ornament shape and cut your photo to size.
Parent tip: Place small decorations like pom poms in small bowls to keep them from getting all over and making it easy for little hands to grab.
Step 2: Attach Photo

With your hot glue gun or craft glue place a few small dots onto the photo and adhere it to your ornament.
Note: If you’re using a hot glue gun with paper use it on the low setting to prevent the paper from being damaged. If you are using craft glue, allow the paper to dry a little before moving onto the next step.
Step 3: Start Decorating

You can choose to just start placing pom poms wherever you like or plan out a pattern first. We chose to color coordinate ours! Place them all around the photo up to the edges of the ornament, you shouldn’t be able to see any of the front of the ornament.
Step 4: Final Touches

Cut your ribbon to size and string it through the top. Allow your ornament to dry (if needed) and hang it on your tree to display!